Looking for the perfect Pain de Panda recipe? look no further! We provide you only the best Pain de Panda recipe here. We also have wide variety of recipes to try.
Cooking could be one of the earliest skills on the planet. That does not imply that there are any limits to the expertise offered for the cook interested in increasing his or her abilities. Also the finest chefs, also professionals, can always find brand-new dishes, approaches and also strategies to boost their kitchen skills, so lets try this Pain de Panda recipe, we hope you like it.
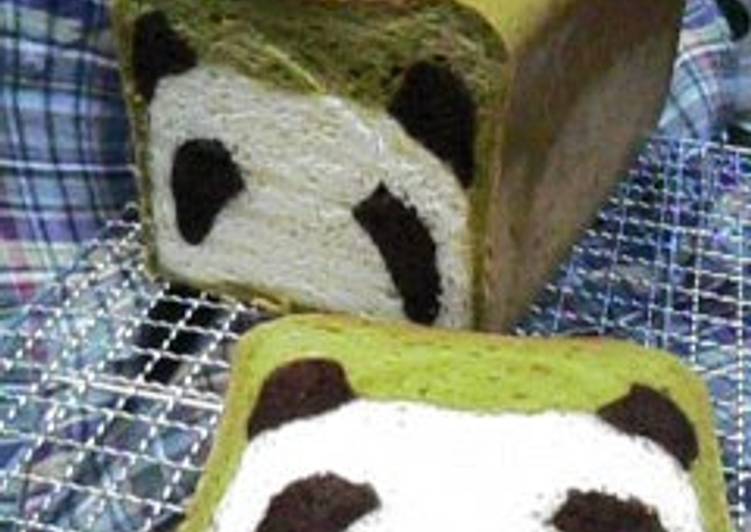
Pain de Panda Recipe
To cook Pain de Panda you need 9 ingredients and 15 steps. Here is how you achieve it.
Ingredients of Pain de Panda :
Use *Bread (strong) flour.
Provide *Cake flour.
You need to prepare *Sugar.
You need to prepare *Egg liquid (milk + 1 egg yolk).
Prepare *Salt.
You need *Unsalted butter.
Prepare Dry yeast.
You need to prepare Matcha.
Provide Cocoa powder.
Pain de Panda step by step :
Put all the * ingredients in a bread machine! (Mix the milk and egg yolk together, and microwave until it's warmed up to body temperature; 40-60 seconds / 35-38°C.) Put the dry yeast in the yeast compartment..
When the dough is done kneading (before the 1st rising starts), take it out of the machine. (Using my bread machine, it takes about 20 minutes.).
Divide the dough into 3 portions for each part of the panda. About 75 g or 1/6 for the cocoa dough; about 210 g or 1/3 for the plain dough; about 285 g or 1/2 for the matcha dough. These weights are what I had (FYI)..
Knead the dissolved cocoa powder into the chocolate dough portion, and the dissolved matcha into the matcha dough portion..
Round off each poriton of dough, place seam side down, and cover with plastic wrap and a tightly wrung out moistened kitchen towel. Leave the dough to proof (1st rising. If using a microwave for this, it takes about 30 to 40 minutes)..
Deflate the dough lightly, cover again and leave to rest for about 20 to 30 minutes. Deflate again..
It's time to put the loaf together! Roll a bit less than half the plain dough (90 g) and 1/6 each of the cocoa dough (27 g each) into cylindrical shapes by rolling them on your work surface. Stick the cocoa dough pieces on the plain dough piece (the cocoa pieces are the eyes)..
Fill the space between the cocoa pieces with about 1/4 of the plain dough..
Roll out the remaining plain dough with a rolling pin, and wrap it around the formed dough parts as if you were wrapping a sushi roll. *Put the seam on the bottom and seal..
Cut the remaining cocoa dough in half, roll each piece out into a long thin pieces, and attach to the top (for the ears)..
Fill the gap between the ears with a bit more than 1/4 of the matcha dough..
Roll out the rest of the matcha dough with a rolling pin, and wrap it around the formed dough as if you were wrapping a sushi roll. *Lay seam side down and seal the edges..
Put the dough in an oiled square loaf pan (in the middle of the pan) and cover with plastic wrap and a tightly wrung out moistened kitchen towel. Leave for the 2nd rising, until the dough has risen to 1 cm under the rim of the pan. If proofing it in a microwave, it takes about 50 to 60 minutes..
Put the lid on the loaf pan, and bake in a 200 °C oven for 25 to 30 minutes..
This is a failed attempt. I added more of the eye-colored dough, and they got too droopy..
A wonderful, home-cooked dish is the kind of thing all of us keep in mind. Using these Pain de Panda recipe to enhance your food preparation is the same as an athlete that maintains training-- the more you do it, the better you obtain, learn as long as you can around cooking. The even more recipe you have, the much better your dishes will taste.
If you find this Pain de Panda recipe helpful please share it to your good friends or family, thank you and good luck.